This year’s iPhone 11’s were not a major upgrade over the last year’s iPhones. However, the camera saw quite a few improvements, making the iPhone 11 one of the best camera phones of 2019. Even though the iPhone 11 gives you good images, with the help of a few iPhone 11 camera tips, you can take even better images.
iPhone 11 camera: what’s new?
All three iPhone 11 models – the iPhone 11, iPhone 11 Pro or 11 Pro Max – come with great camera features. The iPhone 11 has two cameras on the back, while the iPhone 11 Pro and 11 Pro Max have three cameras each. The ultrawide lens features a 120-degree field of vision and an f/2.4 aperture, while the standard wide-angle lens gets an f/1.8 aperture. For the telephoto lens, the aperture is f/2.0.
Further, the camera offers a 2x optical zoom. You can even zoom out to the same degree using the ultrawide lens. The iPhone 11 camera also gives you image stabilization across both the wide-angle lenses, and videos as well. Talking of the front camera, it is 12 megapixels.
Along with improved hardware, Apple has updated the software as well to help users take better images in low-light and other situations. Moreover, with almost every iOS update, Apple continues to make the camera better. For instance, with the iOS 13.2, Apple enabled the Deep Fusion camera feature for taking better images.
In all, the iPhone 11 has offered many camera updates (both in terms of software and hardware) to give you better images. You can, however, take even better images by following the iPhone 11 camera tips from the professionals who used the iPhone 11 themselves. These tips from professionals were made available by Apple to USA TODAY, and relate to how to use specific iPhone 11 camera features for the best results.
iPhone 11 camera tips
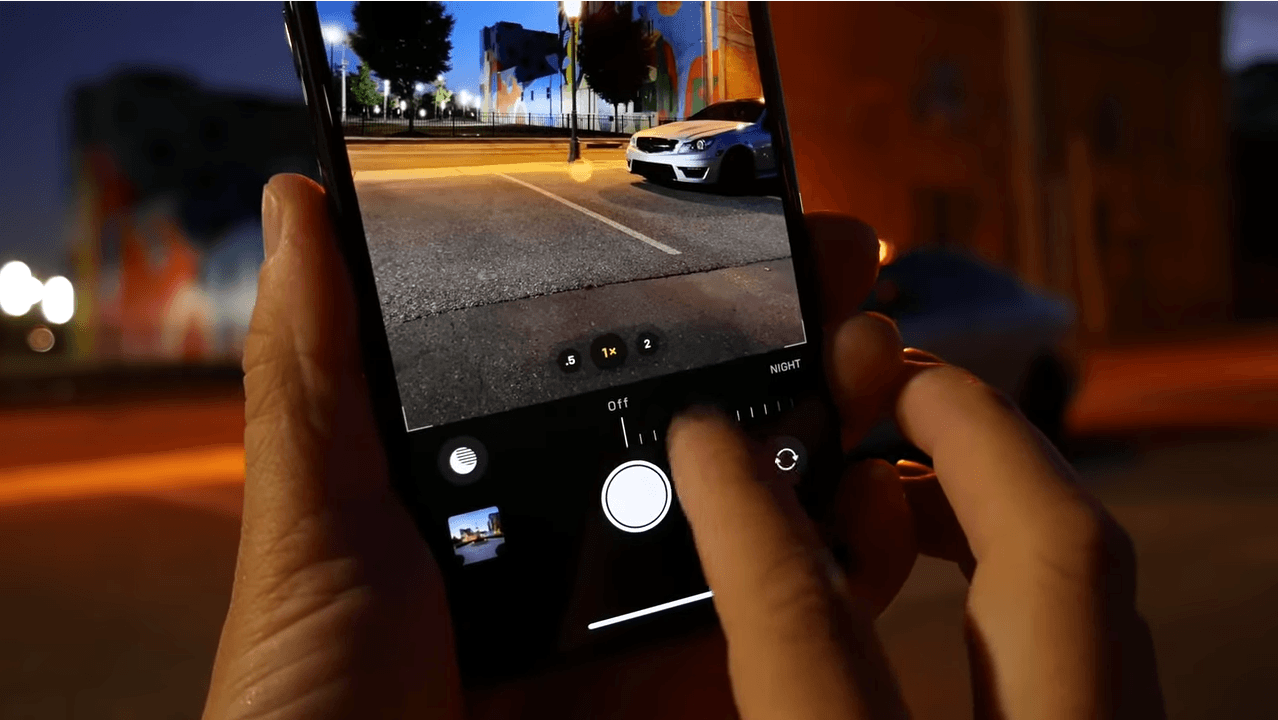
The first tip is regarding the use of the Night Mode feature. Unlike the Android, the Night mode on the iPhone comes into use automatically. As per the experts, the user must first identify the light source and then stand still with the subject facing the light. This will ensure the maximum possible light. To avoid camera shake, you should stand firmly with both feet on the ground, tucking in your elbows. Also, you can adjust the seconds the Night mode takes to capture great low-light images.
Another expert notes that prior to iPhone 11, he had to use artificial lights or the flash to take images in low light. However, the use of artificial lights completely changes the thought behind the image. With the iPhone 11 Night mode, there are no such issues. The resulting images are not blurry or too dark, rather are bright enough to bring out the details that you want from the image.
The next tip is regarding the use of an ultra wide angle. One of the best ways to get better images in ultra wide angle is to get down low, bending or leaning lower to the ground. Though it could get a bit uncomfortable, the end result, as per the expert, is worth all the pain.
If you are using the Portrait mode, the trick is to create a distance between the subject and the background. This helps you to get more separation as the Portrait mode creates depth by mimicking the depth of field.
Another tip is regarding the use of telephoto (2x) and wide (1x) capabilities. Those who want to flatten the image should go for a telephoto camera, while the wide camera is best for taking waist up portraits.
Tips for shooting video
For those who don’t know whether to record 4K video at 24 frames, 30 frames or 60 frames per second, there is a tip as well. As per the professional, it is better to set 4k at 24 fps as default as it uses less storage space. However, if you want your videos style to look as you see on TV, then use 4k at 30 fps. And, if you want to capture action sports or plan to edit the video into slow motion, then it is better to use 4k at 60 fps.
Again, if you are confused of whether to shoot a video horizontally or vertically, there is a tip for that as well. If you plan to take a video of yourself to share on social media platforms, such as Facebook, Snapchat and more, then it is recommended taking a video vertically. On the other hand, if you are taking a video of a third-person or capturing memories of your travels, then it is better to shoot horizontally. Shooting horizontally gives a more cinematic format and looks nice if you play on a TV screen or AirPlay.
Professionals also recommend using the editing tools in iOS 13 to enhance your images further.