New PC users would do well to pick up a few things from veterans, one of which includes ejecting a USB stick safely before removing it from the port. Many users don’t even bother to take the extra step because it’s unclear why it was needed. However, a new Windows 10 update makes it easier to remove the USB stick because it will no longer require you to click “Safely Remove Hardware” before ejecting the USB device.
Even though some people didn’t bother with that step when removing an external device such as a USB-connected external hard drive, smartphone or camera, it will no longer be necessary because Windows has switched from a performance-focused profile to quick-focused profile. The change means users can now remove the USB stick directly from the port without “removing it” via the software first. The feature is now available in version 1809 of the operating system.
Few have thought much about why Microsoft ever advised users to “Safely remove hardware” via the taskbar or desktop before removing a USB device. However, there is a technical reason concerning the security and consistency of the files. Removing such devices via your desktop or taskbar is safer because it ensures any unwritten or unsaved data won’t get lost.
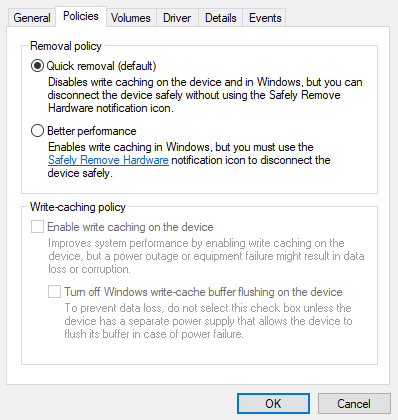
The new Windows 10 update allows users to choose between two different modes for removing USB devices, Microsoft explained. The “Better Performance” option uses cache to perform reading and writing operations and requires users to safely remove hardware for the cache to be properly flushed and closed before the device is removed. This option has been enabled as the default setting for years on both Windows 10 and previous versions.
However, in the new update, Microsoft decided to switch from “Better Performance” to “Quick Removal” as the default setting, which allows the storage device to be removed as soon as users are done transferring data between their PC and the storage drive. While useful, there is one downside to the feature, which is poorer performance, which could cause write operations to be degraded with the feature.
While many people in a hurry will embrace this change, some will still prefer to be safe rather than sorry. It’s easy to switch back to the old default setting by inserting a USB device and then opening File Explorer. Next, you must look for the letter assigned to the device, and then right-click “Start” and choose “Disk Management.” Right-click the letter which corresponds to the device you want to change the setting for, and choose “Properties.”
The only disadvantage is a short wait to “remove your hardware safely.”