In many cases when you want to create a video you may have to record different types of video footage, or use multiple sources of video. That often means having to use different devices and platforms and then finally encoding it all as video files and transferring it over to yet another platform to compile and edit it.
[REITs]Q1 hedge fund letters, conference, scoops etc
Needless to say that can be fairly complicated – but there is an alternative: Movavi Screen Capture Studio. It is a comprehensive all-in-one studio that will let you capture video from a variety of different sources.
If you want you could start to record video on PC with Screen Capture Studio right now once you launch it. All you need to do next is decide how you’d like to capture the video footage that you need:
- Record videos from the PC screen
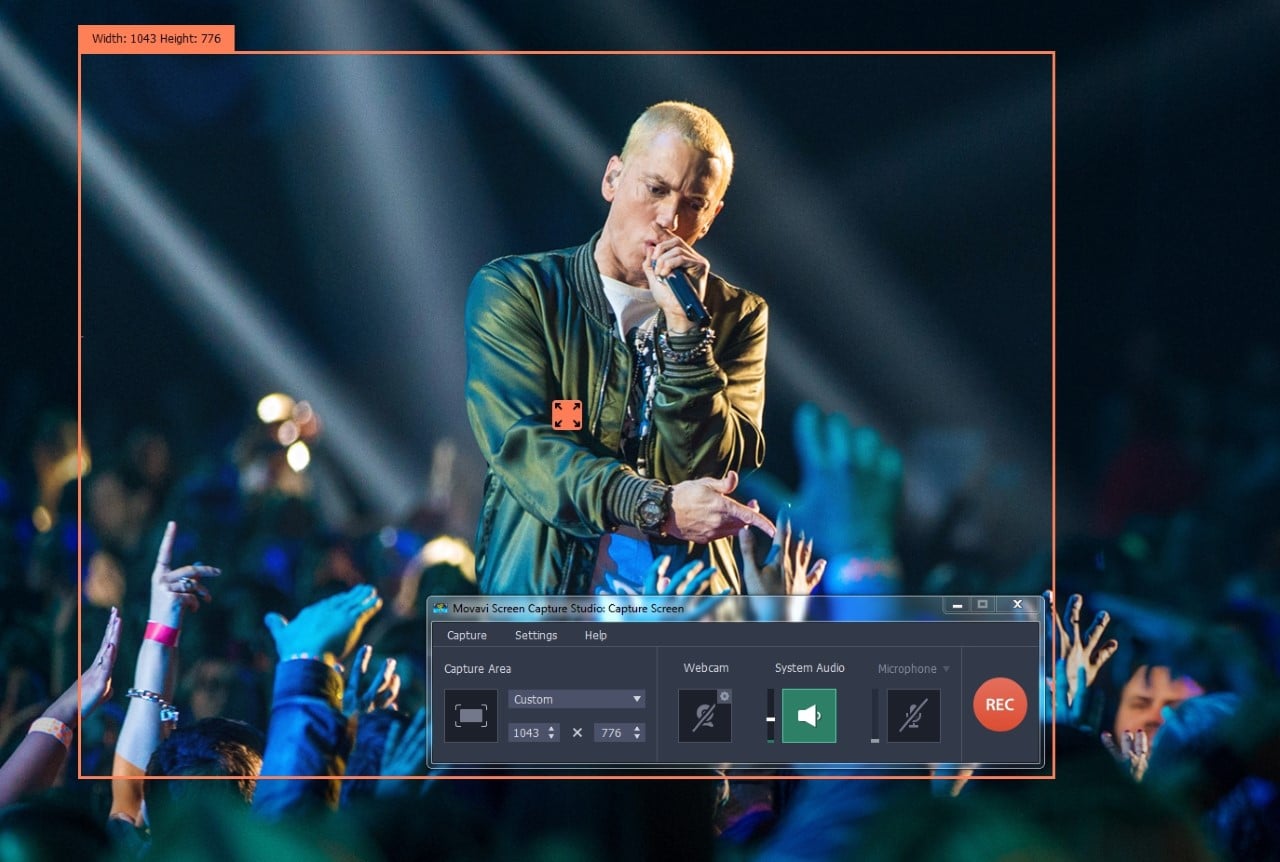
If you want to record videos from your screen, select the ‘Record screen’ option in the launch window then draw a frame over the area that you want to record using your cursor. After you do the recording interface should appear and you can select the audio source, adjust the volume levels, set the frame rate, or configure it to capture keyboard and mouse actions. When you’re ready press ‘REC’ to start recording and then ‘Stop’ when you’re done.
- Record videos from a webcam, TV tuner, VHS player or other external device
If you would prefer to record video footage from any other external device, plug it in then select ‘Edit video’ in the launch window. In the editor you should click on the ‘Record Video’ option, and expand the list under ‘Video capture device’ to select the one that you want. After that you can set up the other recording parameters and click ‘Start Capture’ to get underway and then ‘Stop Capture’ to stop recording.
- Import videos from AVCHD camcorders
Assuming you’ve already recorded the video footage that you need on an AVCHD camcorder, you can import it directly into Movavi Screen Capture Studio. To do that make sure it is plugged in and select ‘Edit video’ in the launch window then click on the ‘Record Video’ button. Unlike previously you should see a list of the videos that are in the AVCHD camcorder and can select the ones that you want then click ‘Add files to the editor’ to import them.
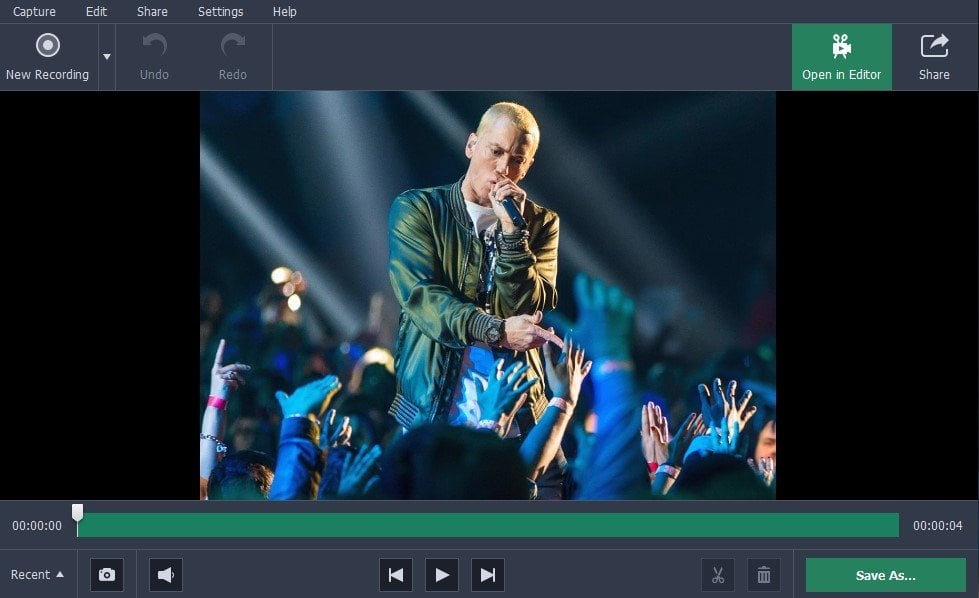
In all of these scenarios after you’re done recording or importing the video you can proceed to load it into Movavi Screen Capture Studio’s built-in editor to compile the final video. The editor itself will provide you with everything you need to get the job done, and you can start by merging clips together, trimming out unwanted parts, and arranging video segments in the right order.
After that you can process your video footage in other ways, such as by enhancing its quality, fixing any issues that are present, or transforming its frame and orientation. It is worth noting that Movavi Screen Capture Studio will let you also add audio tracks to your videos, apply special effects and filters, insert text elements, include animated transitions, and polish your videos in a lot of other ways too.
As you can see it is really very straightforward to record various types of videos from multiple sources using Movavi Screen Capture Studio, which is part of what makes it so useful. On top of that however it will provide you with powerful editing features that will prove to be extremely useful if you intend to create impressive videos that really stand out.